
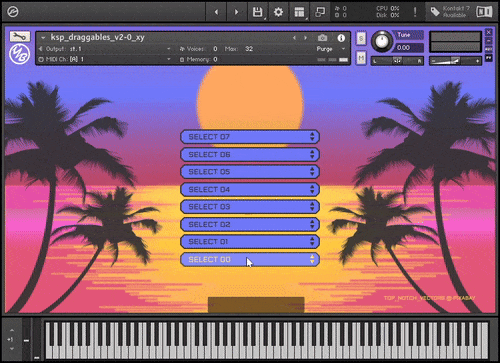
this is an update to the v1.0 drag & drop script. You can now set horizontal draggables or vertical draggables like lists (see animation below). For real use cases also see Rearrange FX Slots via Draggables
drag n drop Script v2.0:
Vertical & Horizontal Draggables
- NKI file: open script tab
- ksp script files (vanilla ksp)
- ksp functions (sublime text)
License:
MIT International License.
https://blog.yummybeats.com/license-text-mit/
You may use this script, modify it, build upon it, as you like (also commercially), as long as you keep all credits within the code visible to others. You may put them into an extra open script tab or inside an about section of your instrument. If you would like to remove the credits or publish them somewhere else, please contact us
YOU MAY NOT commercialize, share, distribute, whatsoever the included image files and other media (©2025 all rights reserved).
Related POSTs
Content
-
preliminary definitions
-
global vars / USAGE
-
installation & setup (vanilla)
-
installation & setup (sublime)
-
docs 2.0: all changes explained premium
preliminary definitions
A few definitions in advance.
In the following there are 2 movement terms used: same and opposite direction
Terms used:
- same direction refers to all x-movements for the horizontal drag & drop and to all y-movements for vertical drag & drop.
- opposite direction refers to all y-movements for the horizontal drag & drop and to all x-movements for vertical drag & drop.
Color coding:
- The pink marker refers to any horizontal movements, the x-axis or or x-positions
- The purple marker refers to any vertical movements, the y-axis or y-positions
DOCS – Global vars & usage
%dd_cursor_index (both vanilla & sublime)
- holds all positions (key) and current cursor index (val) at the position
- each key gets updated with the new cursor index after each cursor movement on mouse release
so the array keys represent the fixed position ([0]: 1st pos, [1]: 2nd pos, and so on)
and the value is the current cursor index on that position.
Use this array to to rearrange multiple items at once like anything from FX chains to data lists or samples, you name it.
Also read rearrange FX Slots, the probably most common use case
$dd_this_cursor (both vanilla & sublime)
holds the current selected cursor index
use this to rearrange a single item, or to get/display the current selected cursor index
Also read rearrange FX Slots, the probably most common use case
$dd_pos (both vanilla & sublime
holds the current selected cursor’s position
use this to rearrange a single item, or to get/display the current position
Also read rearrange FX Slots, the probably most common use case
[sublime only]
function yb_dd_rearrange(index,pos,index_all)
This function is always called on every mouse release after dragging an element to a new position.
use this function to rearrange anything by simply adding your code into this function or by calling other functions within this function. Use the function’s local arguments (which are nice & short) to pass all necessary parameters:
index equivalent to $dd_this_cursor, is passing the current selected cursor index
pos equivalent to $dd_pos, is passing the current selected cursor’s position
index_all equivalent to %dd_cursor_index, is passing the complete array with all positions and indices
How to “install” the script (vanilla ksp)
- copy the whole code from inside the on init into your on init. It is best to place the code somewhere below yours.
But don’t copy the “on init” “end on” again - copy the whole code from below the on init somewhere below your on init.
- Put the copyright notice in a visible location (e.g. into an extra open script tab or into an about section of your instrument).
on init
  {### YOUR CODE ###}

  {YUMMYBEAT'S KSP DRAG & DROP SCRIPT}
end on

{### YOUR CODE ### }

{YUMMYBEAT'S KSP DRAG & DROP SCRIPT}
on ui_control (?dd_area)
  {.....}
end on
{SET DRAG & DROP AREA}
declare const $DD_NUM_CURSOR := 8 {set the amount of total cursors; max = 16}
declare const $DD_AREA_WIDTH := 400 {set the drop down area width}
declare const $DD_AREA_HEIGHT := 148 {set the drop down area height (this should equal the cursor image height)}
declare const $DD_AREA_JUSTIFY := 1 {justify the drag & drop area: 1 = center; 0 = left}
declare const $DD_AREA_POS_X := 0 {left indent; set to 0 when align = center}
declare const $DD_AREA_POS_Y := 100 {position the drag & drop area vertically}
declare const $DD_DIRECTION := 1 {0:= horizontal; 1 = vertical}
$DD_MOUSE_X := 0 {set mouse behavior X: default = 0; min = 1; max = 1000}
$DD_MOUSE_Y := 0 {set mouse behavior Y: default = 0; min = 1; max = 1000}
$DD_DIRECTION (vanilla) / dd_direction (sublime: function arg)
[NEW] switch between 0 = horizontal list vs 1 = vertical list
$DD_MOUSE_X; $DD_MOUSE_Y (vanilla) / dd_mouse_x; dd_mouse_y (sublime function arg)
[NEW] sets custom drag movement speed.
leave 0 for default / automatic setting
Max speed is 1000; Lowest speed is 1 (almost no movement)
$DD_MOUSE_X: horizontally
$DD_MOUSE_Y: vertically
Note:
- setting a custom value for both directions will create a completely free omnidirectional cursor movement while still having the sorting function feature, just try it yourself.
- If only same direction values are set, the movement speed can only be slowed down (since the default setting, is already max speed), resulting in a unidirectional movement (default behavior)
- If only opposite direction values are set, the movement speed can only be increased (since the default setting is already lowest speed), resulting in the above mentioned bidirectional cursor movements (since the same direction’s default setting is max already)
Cases:
$DD_DIRECTION = 0: $DD_MOUSE_X = same movement
$DD_DIRECTION = 0: $DD_MOUSE_Y = opposite movement speed
$DD_DIRECTION = 1: $DD_MOUSE_X = opposite movement
$DD_DIRECTION = 1: $DD_MOUSE_Y = same movement
Examples:
1. Horizontal Drag & Drop: One Direction, Cursor movement default but slowed down
$DD_DIRECTION = 0, $DD_MOUSE_X = 100
$DD_DIRECTION = 0: $DD_MOUSE_Y = 0
2.Horizontal Drag & Drop: Omnidirectional, Cursor movement max
$DD_DIRECTION = 0, $DD_MOUSE_X = 1000
$DD_DIRECTION = 0: $DD_MOUSE_Y = 1000
3. Vertical Drag & Drop: One Direction, Cursor movement default but slowed down
$DD_DIRECTION = 1: $DD_MOUSE_X = 1
$DD_DIRECTION = 1: $DD_MOUSE_Y = 100
4. Vertical Drag & Drop: Omnidirectional, same direction max <=> opposite direction slow
$DD_DIRECTION = 1: $DD_MOUSE_X = 100
$DD_DIRECTION = 1: $DD_MOUSE_Y = 0
$DD_NUM_CURSOR (vanilla) / (sublime: no need to set this value)
defines the number of cursors (max 16)
$DD_AREA_WIDTH (vanilla) / dd_width (sublime: function arg)
sets the total width of the drag & drop area in pixels
$DD_AREA_HEIGHT (vanilla) / dd_height (sublime: function arg)
defines the total height of the drag & drop area in pixels
$DD_AREA_JUSTIFY (vanilla) / dd_justify (sublime: function arg)
defines the horizontal alignment of the the whole drag & drop area within your UI.
0 = Left
1 = centered
$DD_AREA_POS_X (vanilla) / dd_posx (sublime: function arg)
positions the drag&drop area accross the x-axis in pixels depending on the $DD_AREA_ALIGN settings. Negative values are allowed but only have effect at centered alignment.
If $DD_AREA_ALIGN the origin is the very left.
if $DD_AREA_ALIGN = 1 the origin is the center of your UI
$DD_AREA_POS_Y (vanilla) / dd_posy (sublime function arg)
positions the drag&drop area across the y-axis in pixels. Negative values have no effect.
How to “install” the script (sublime text)
- put this in the top of the on init (before calling any functions):
declare !cursor_img[] := ("cursor_list_0","cursor_list_1","cursor_list_2","cursor_list_3","cursor_list_4","cursor_list_5","cursor_list_6","cursor_list_7") declare const DD_CURSOR_COUNT := cursor_img.SIZE - in the KSP folder open “ksp_draggables_v2-0_xy (sublime).ksp” and copy all the required functions somewhere into your script. Preferably under the “on init”:
REQUIRED FUNCTIONS: yb_init_ddarea, yb_dragndrop_colision, yb_justify_content
OPTIONAL FUNCTIONS: yb_set_ui - Call the
yb_init_ddareafunction without the “call” expression anywhere inside the on init and pass all arguments. Read the little SETUP box below - Add an on ui_control for ?dd_area and call the yb_dd_oncontrol like so:
on ui_control (?dd_area)
  yb_dd_oncontrol
end on
- please copy the credits & copyright notice (from inside the script) somewhere clearly visible e.g. into another open script tab or into an about section of your instrument.
If you would like to completely remove the copyright notice, shorten it or place it somewhere else, please get in touch @ https://yummybeats.com/contact
SETUP
declare !cursor_img[] := ("cursor_list_0","cursor_list_1","cursor_list_2",...)
- add custom cursor images. Simply replace all values with your filenames without file extension (.png)
- The images should be formatted like a button with 6 states, learn more (don’t forget to add the txt file)
- To use more than 8 cursors simply extend the array. Up to 16 cursors allowed. A max cursor count would looks like this:
declare !cursor_img[] := (“cursor_0”, “cursor_1”, “cursor_2”, “cursor_3”, “cursor_4”, “cursor_5”, “cursor_6”, “cursor_7”, “cursor_8”, “cursor_9”, “cursor_10”, “cursor_11”, “cursor_12”, “cursor_13”, “cursor_14”, “cursor_15”)
Passing the Arguments & defining the DD area
yb_init_ddarea(ui_width,ui_height,dd_width,dd_height,dd_justify,dd_posx,dd_posy,dd_direction,dd_mouse_x,dd_mouse_y,dd_array_cursorimg)

{}
ui_widthpass the total width of your UI in pixels e.g. 800ui_heightpass the height of your UI in pixels e.g. 400dd_widthpass the width of the drag n drop areadd_heightpass the height of the drag n drop areadd_justifyjustify the dd_area along the x-axis … 0=left/start, 1=center, 2= right/enddd_alignalign the dd_area along the y-axis … 0=top; 1=center; 2=bottomdd_posxmove the dd_area across the x-axis depending on the justification (negatives values = left; positive values = right)dd_posymove the dd_area across the y-axis depending on the alignment (negatives values = up; positive values = down)dd_direction0=horizontal cursor movement; 1=vertical cursor movementdd_mouse_xdrag speed across the x-axis 0=default; 1000=max (note: both values above 0 means free cursor movement in 2D space) (read vanilla for detailed explanation)dd_mouse_ydrag speed across the y-axis 0=default; 1000=max (note: both values above 0 means free cursor movement in 2D space) (read vanilla for detailed explanation)dd_array_cursorimgused to pass the cursor image array, so always keep it set to “cursor_img” unless you are using a custom array for the images
example
on init
  //declare const $UI_WIDTH := 800 //NOT REQUIRED BUT RECOMENDED TO SIMPLYFY REPEATING UI SETTINGS
  //declare const $UI_HEIGHT := 400 //NOT REQUIRED BUT RECOMENDED TO SIMPLYFY REPEATING UI SETTINGS

  // PUT THIS BEFORE CALLING yb_init_ddarea
    declare !cursor_img[] := ("cursor_list_0","cursor_list_1","cursor_list_2","cursor_list_3","cursor_list_4","cursor_list_5","cursor_list_6","cursor_list_7")
    declare const DD_CURSOR_COUNT := cursor_img.SIZE

  // CALL THE FUNCTION(S)
    yb_init_ddarea(800,400,228,224,1,0,100,1,0,0,cursor_img)
    yb_set_ui (800,400,"wp2","yb_ico")
    yb_decalre_display(800,400,160,28,-6,"",1,2)

  message("")
end on

on ui_control (?dd_area)
  yb_dd_oncontrol
end on

function yb_init_ddarea(ui_width,ui_height,dd_width,dd_height,dd_justify,dd_posx,dd_posy,dd_direction,dd_mouse_x,dd_mouse_y,dd_array_cursorimg)
end function

function yb_dd_oncontrol
end function

function yb_dd_rearrange(index,pos,index_all)
  // SIMPLY ADD YOUR CODE / FUNCTIONS HERE AND USE THIS FUNCTION TO REARRANGE STUFF.
  // DON'T CALL THIS FUNCTION IN OTHER CALLBACKS, IT WON'T GET UPDATED, USE THE GLOBALS ($dd_this_cursor,dd_cursor_pos,%dd_cursor_index) INSTEAD THEN.

  // index: current selected cursor index, like $dd_this_cursor but locally within this function only
  // pos: current position of the selected cursor, like $dd_cursor_pos but locally within this function only
  // index_all: array with all current cursor positions. key = position, value = current cursor
  // all the variables and array get updated on mouse release after dragging a cursor
  message(index_all[2])
end function

function yb_justify_content(id,ui_width,type,width,pos)
end function

function yb_align_item(id,ui_height,type,height,pos)
end function

function yb_set_ui(width,height,wallpaper,icon)
end function

function yb_decalre_display(ui_width,ui_height,width,height,pos,picture,justify,align)
end function
DOCS v2.0: All changes explained (vanilla ksp)
The following explains the new features which have been made to the v1.0 docs
To dive in more deeply or for better understanding please also read the v1.0 docs
premium content
{DD-AREA SPECIFIC ARRAYS }{DDXY03}
    declare %dd_id[$DD_NUM_CURSOR*2]
    declare ?dd_last_cursor_val[$DD_NUM_CURSOR*2]
    declare %dd_cursor_index[$DD_NUM_CURSOR]
    declare %xy_cursor_index[$DD_NUM_CURSOR*2]
    declare ?dd_cursor_val[$DD_NUM_CURSOR*2]
unlock the full article
including all downloads!
unlock premium content
Leave a Reply