
Unfortunately once the initial wallpaper is set, we can’t alter the image file anymore. Even not by setting different initial wallpapers for each script tab. Because the last applied wallpaper will be the one and only initial wallpaper for the whole instrument.
But we can either offset the initial wallpaper that means moving it via set_skin_offset or we can use a label element to set up multiple backgrounds which is covered in this article. Even dynamically like switching them when hitting a navigation button.
make_perfview
makes the current tab visible (outside the edit mode)
set_ui_height_px(<height>)
set the height of your ui in pixels
set_script_title(<text>)
sets the name of your tab (only when using more than one tab)
set_control_par_str(<ui-ID>,<control-parameter>,<value>)
use this command in combination with the variables below to set the background
$INST_WALLPAPER_ID
The (fixed) ID of the instrument wallpaper.
$CONTROL_PAR_PICTURE
sets the picture name
get_ui_id(<variable>)
retrieve the numeric id of the specific ui element (integer)
on ui_control(<variable>)
UI callback, executed whenever the user changes the respective UI element
declare ui_switch $<variable-name>
creates an ui switch (button)
declare ui_label $<variable-name> (<width>,<height>)
creates an ui label, used for an adjustable background graphic. Width and height in grid units which can be set to 1 since your graphic will expands the label anyway
move_control(<variable>,<x-position>,<y-position>)
positions an element in the grid use it to move the label to top left corner (0,0) you can also use
move_control_px(<variable>,<x-position>,<y-position>)
to position with the exact pixels
Dynamic, switchable Wallpaper/Background
We can use a label UI element and its background property ($CONTROL_PAR_PICTURE) to set multiple background wallpapers. Like most UI elements, also the label element allows us to change its background image and its size.
So we just need to create an image with the size of our UI and add it as the label’s background. With this label we have a 2nd wallpaper overlaying our initial wallpaper. With one little restriction though:
We can also put our knobs and buttons on top of our second wallpaper label then, since knobs and buttons are overlaying labels again.
If we want to use multiple wallpapers we can simply replace the image of our “wallpaper label” with another wallpaper image instead of creating a new label element for each additional wallpaper image. To cut it short, the label element becomes a container for all of our additional wallpapers.
setting the label container
Example (read the explanations in brackets {…} )
on init
     set_ui_height_px(540) {height of your UI}
     make_perfview {makes this UI visible outside the edit mode}

     {SET: initial wallpaper}
     set_control_par_str($INST_WALLPAPER_ID,$CONTROL_PAR_PICTURE,"wallpaper1") {sets your initial wallpaper which can only be overlayed}

     {SET: vraiables}
     declare $label_id {used to store the label id, later we will use arrays}
     declare $button_id {used to store the button id, later we will use arrays}

     {SET: label / wallpaper 2}
         declare ui_label $wallpaper (0,0) {creates a label "container" for your additional wallpapers}
         $label_id := get_ui_id ($wallpaper) {get the numeric unique id of the label}

         set_control_par_str($label_id ,$CONTROL_PAR_TEXT,"") {clear the default text}
         set_control_par_str($label_id ,$CONTROL_PAR_PICTURE,"wallpaper2") {set background image}
         set_control_par($label_id ,$CONTROL_PAR_HIDE,$HIDE_WHOLE_CONTROL) {hides the whole label because we first use the initial wallpaper}
         move_control_px($wallpaper,0,0) {move to top left position}

     {SET:button}
         declare ui_switch $button_switch_wallpaper {create a simple button to switch the wallpapers}
         $button_id := get_ui_id ($button_switch_wallpaper) {get the numeric unique id of the button}
    message("") {clears the status bar}
end on

on ui_control($button_switch_wallpaper)
     if ($button_switch_wallpaper = 1)
         set_control_par($label_id ,$CONTROL_PAR_HIDE,$HIDE_PART_NOTHING) {shows your label}
         else
             set_control_par($label_id ,$CONTROL_PAR_HIDE,$HIDE_WHOLE_CONTROL)
     end if
     message("") {clears the status bar}
end on
- we create an ui label and add our 1st background graphic with
set_control_par_str($label_id ,$CONTROL_PAR_PICTURE,"filename-of-our-1st-wallpaper"). - we hide it again via
set_control_par($label_id ,$CONTROL_PAR_HIDE,$HIDE_WHOLE_CONTROL)because initially we only want to show the “initial wallpaper” - via
set_control_par($label_id ,$CONTROL_PAR_HIDE,$HIDE_PART_NOTHING)we can now adjust our label and change its background and other properties within any callbacks like the on_note or on ui_control callback. This means we can create a navigation button to switch our background. And btw, not only the background but the whole ui screen with all its elements. This is explained in detail in the complex ui with multiple screens article
Creating a wallpaper image FOR THE LABEL ELEMENT
- we can use our favorite graphic software. Just read the Custom UI: Background Image / Wallpaper tutorial.
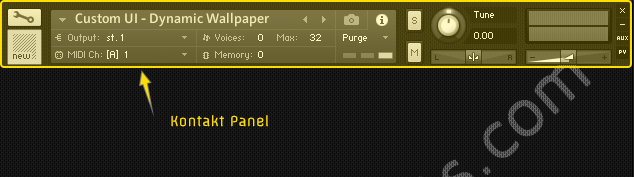
- first we should add a horizontal auxiliary line at 68px and design our initial wallpaper including the 68px header (which will be behind the Kontakt panel).
- then we create a new layer and create our 2nd wallpaper below the auxiliary line.
- take care to make it look flawless, so that the header of your initial wallpaper also fits to your second wallpaper. Best way to do so is to use one background texture like in this example:

- when we are done we simply crop our 2nd wallpaper below the header at the auxiliary line and save it (e.g. as wallpaper2.png)

Label element vs Set Skin Offset
You can also set a background wallpaper set_skin_offset(). It’s up to you which method you prefer the most. Both have advantages and disadvantages.
With the label element it is much easier to design our backgrounds instead of making a long image “tube” especially when altering our background graphic a lot.
The set_skin_offset method however is somewhat easier to handle when it comes to coding and also less error prone. Also we can alter the first 68px (where the Kontakt panel resides)
Set Skin offset (learn more)
Remove the row
Column: 1
Cons
- cumbersome graphic design
especially when working with many similar wp-screens and graphic layers
Column: 2
Pros
- covers the whole area
including the first 68px which cant be addressed by KSP - slightly easier coding
Label Element (this)
Remove the row
Column: 1
Cons
- doesn’t cover the first 68px
- slightly more complicated coding
Column: 2
Pros
- way better graphic design workflow, less frustration and mistakes
especially when working with many similar wp-screens and graphic layers - redundant graphic design work can be better achieved
since in your graphics tool all wallpaper screens are layered on top of each other we can for example test different backgrounds for all screens at once
Duccio
Idem, not work........The label remain little standard (no image taken over)....after 5 ours.....no labels. only text with label transparent.YummyBeats
I guess something must be wrong with your Kontakt then?! Because everything works fine here. I just checked with Kontakt 5 & 6
Kontakt sometimes shows a weird behavior and the UI isn't working properly anymore if you use the wrong ASIO driver or if you are using ASIO throughout multiple apps at the same time.
In this case try to change your ASIO drivers or restart your whole system and only open Kontakt Standalone for testing
It is also possible that it is something else entirely. Unfortunately all I can tell you is that it sounds like a very unusual behavior
This comment also refers to this issue
Anonymous
is it possible to do the same with Sliders/KnobsYummyBeats
yes, you can hide/display knobs/sliders via
$CONTROL_PAR_HIDEhide:
show:
Leo
I wonder if it is possible to segregate the images/knobs/sliders in the pictures folder by putting them into separate folders?
so instead of using directly the
maybe we can do like this?
YummyBeats
as far as I know this is not possible. You can only use custom paths or subfolders with midi files etc.
Is it important for you to use subfolders?! I mean at the end you would create one resource container anway, so I gues you just need them for a better overview, right? So instead of using subfolders you could also sort by a file naming system like starting all button images with "btn_" all backgrounds with "bg_" and so on.