
KSP Scripting (Kontakt) :: Custom UI :: Switchable, Dynamic Wallpaper via set_skin_offset()
 this tutorial is based on the Wallpaper and the Dynamic Wallpaper (via label element) tutorial. Actually once the initial wallpaper is set we can’t change it anymore but we can move the wallpaper image vertically via
 set_skin_offset(). So if we create a wallpaper sprite which is as double as high as our ui_size (in this case 2 x 608px) we can put 2 wallpapers into this one image file like shown on the left. The visible area is only from 0 pixel to 608 pixel.
We can now set a button for example which moves the background skin 608 pixel vertically to put the second wallpaper into the visible area. This short demo video shows how it works:
Please accept YouTube cookies to play this video. By accepting you will be accessing content from YouTube, a service provided by an external third party.
If you accept this notice, your choice will be saved and the page will refresh.
on init
  make_perfview
  set_ui_height_px(540)
  set_control_par_str($INST_WALLPAPER_ID,$CONTROL_PAR_PICTURE,"wallpaper")
  declare $count
  declare ui_button $switch_wp
  set_control_par_str(get_ui_id($switch_wp),$CONTROL_PAR_PICTURE,"btn_1")
  set_control_par_str(get_ui_id($switch_wp),$CONTROL_PAR_TEXT,"")
  set_control_par(get_ui_id($switch_wp),$CONTROL_PAR_WIDTH,40)
  set_control_par(get_ui_id($switch_wp),$CONTROL_PAR_HEIGHT,40)
  set_control_par(get_ui_id($switch_wp),$CONTROL_PAR_POS_X,296)
  set_control_par(get_ui_id($switch_wp),$CONTROL_PAR_POS_Y,430)
end on

on ui_control($switch_wp)
  if ($switch_wp=1)
    $count := 0
    {set_skin_offset(608)}
    while ($count<609)
      set_skin_offset($count)
      wait(1000) {set to zero to switch instantly or remove this whole while loop}
      inc($count)
    end while
  else
    set_skin_offset(0)
  end if
end on
For the video demonstration we did a slow animation but of course usually you wanna switch the wallpaper instantly. With wait(0) there will be no animation.
Or you can remove the whole while loop (but don’t forget to add the set_skin_offset(608) again then)
Set Skin Offset vs Label element layer
You can also set a background wallpaper via label element. It’s up to you which method you prefer the most. Both have advantages and disadvantages.
With the label element it is much easier to design a background image. We can work with layer groups in our graphics tool. This way we can for example reposition elements for all our Kontakt menu screens at once. With set skin offset however we have to create a long image “tube”. which no longer allows us to rearrange elements at once.
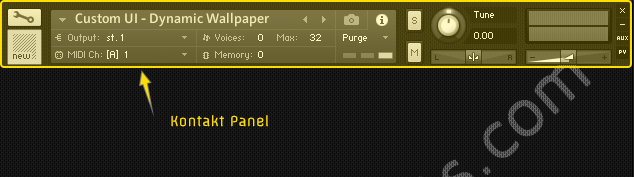
The set_skin_offset method however is somewhat easier to handle when it comes to coding. It’s also less error prone. Also we can wallpaper the first 68px (where the Kontakt panel resides) which is not possible with the label element layer.
Set Skin offset (this) |
|
Cons |
Pros |
|
|
Label Element (learn more) |
|
Cons |
Pros |
|
|


Mike
if I want to make displaying notes on the virtual fretboard the notes pressed on the MIDI keyboard .how it works?
YummyBeats
(in reply to Mike)
uh sorry that’s a little too complex for the comments here. Extemporaneously, I would work with an array matrix (holding the x & y positions for each note)