
KSP Scripting (Kontakt) :: Custom UI: Background Image / Wallpaper
The instruments background image is called “wallpaper”. Its’ the basic background texture where all UI elements (knobs, buttons etc) get layered on top. Just to give you an example: we could take our default graphic software and design a realistic synth surface wallpaper (png file) containing “sockets” for some knobs and buttons with detailed shadows, light reflections etc. After that, we can create the individual knobs & buttons and place them exactly inside the designated sockets and areas by layering them on top of our background wallpaper.
used commands & variables
# METHOD 1 & 2
make_perfview
makes the current tab visible (outside the edit mode)
set_ui_height_px(<height>)
set the height of your ui in pixels
# METHOD 2 ONLY
set_control_par_str(<ui-ID>,<control-parameter>,<value>)
use this command in combination with the variables below to set the background
$INST_WALLPAPER_ID
The static ID of the instrument wallpaper (always the same)
$CONTROL_PAR_PICTURE
sets the picture name
1. Set wallpaper via instrument options (easiest, fastest)
- create a Resource Container (learn more)
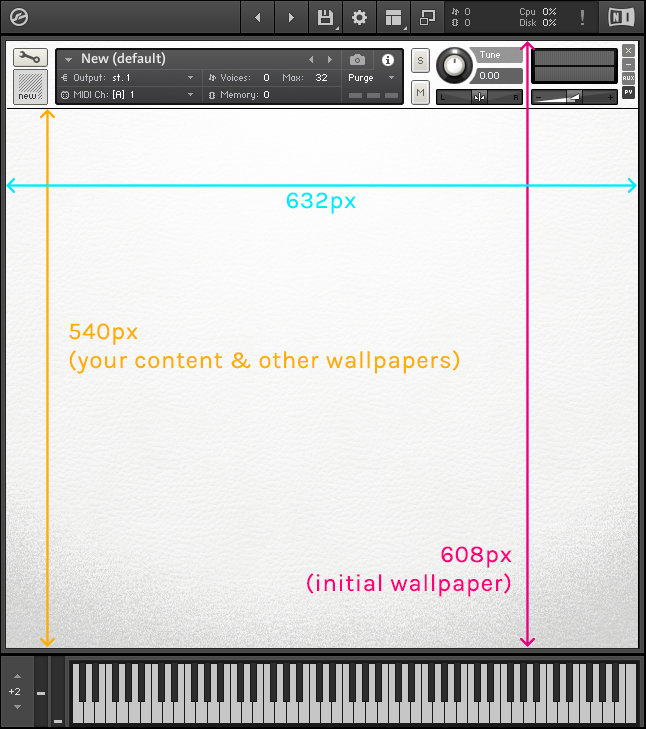
- create a wallpaper image with a height of min 118px to max 818px (depending on your UI height).
And with a width of min 632px to max 1000px (depending on your UI width)
Since Kontakt 5.6 the max width is 1000 px
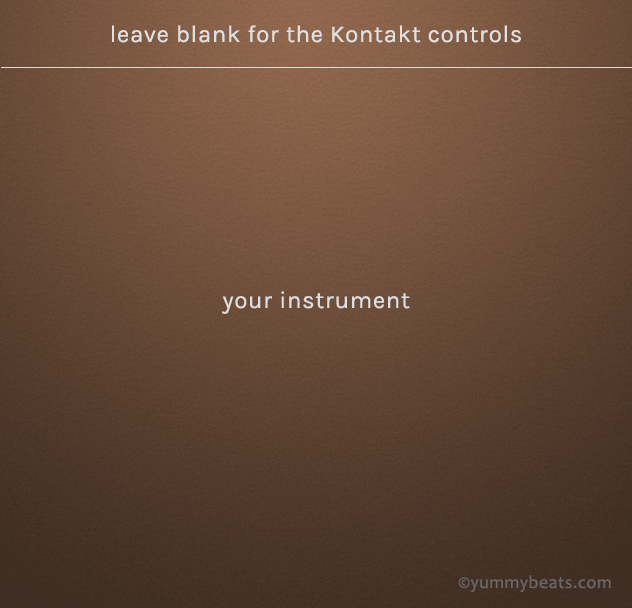
Since Kontakt 6 the max height is 750 px + 68px for the header (see below) - Initial Wallpapers are attached at the very top, above Kontakt’s instrument panel. At -68px so to say. So we should still paper it in our initial wallpaper image (looks better), but also leave some space (68px) for this instrument panel (like shown in the images below)

- this is what the wallpaper image could look like (for an UI height of 540px)
- put the wallpaper image into \Resources\pictures\
- in Kontakt: we create a new instrument
- click on the wrench button and click on instrument option
- click on browse (next to Instrument Wallpaper) and choose our background image
- now open a script tab and define our UI height by adding some code into it. We also make the UI visible outside the edit mode. Thereby we can set the exact height in pixels with
set_ui_height_px(540)or if we rather want to work with grids we can useset_ui_height(8). When working with graphics we should always stick with the pixel system:on init make_perfview {makes the UI visible outside edit mode} set_ui_height_px(540) {defines the height in px} message ("") {clears all former messages in the status bar} end on


2. set Wallpaper via KSP Script (common way):
on init
  make_perfview
  set_control_par_str($INST_WALLPAPER_ID,$CONTROL_PAR_PICTURE,"wallpaper1")
  set_ui_height_px(540)
  message ("")
end on
Actually this is the same method as method 1. So we can follow method 1 again but instead of loading our wallpaper via “instrument options” we simply add another line of code: set_control_par_str($INST_WALLPAPER_ID,$CONTROL_PAR_PICTURE,"<filename-of-your-wallpaper">
Note: only enter the filename of the wallpaper not the file ending (like png) and don’t add any folders. Kontakt will find the correct image if we have put it into \Resources\pictures\ (also don’t forget to add the little txt file)
Keep in mind that the initial wallpaper is static (always visible), so it can’t be changed once it has been set. We can only offset it via set_skin_offset(). Or overlay it with other background image files.
Proceed to the Switchable, Dynamic Background tutorial if you want to learn more about creating multiple, dynamic backgrounds. Llike one background for an fx section, another for a browser section etc
“Change” the wallpaper dynamically e.g. via button event:
there are again 2 methods to “change” the wallpaper e.g. via button event:
- we can use any ui elemnt’s background property to overlay the initial wallpaper with another background image read more
- or if we want to make a whole wallpaper sprite we can use the set_skin_offset() to move the sprite vertically up and down read more


bodes
I’m still very confused about the height of the wallpaper in relation to my set_ui_height_px()
My UI was set in my script to 160px so I made my wallpaper 228px tall (which I think is following along correctly) but it doesn’t seem to work correctly.
Any help is greatly appreciated and thank you for putting together this website
YummyBeats
(in reply to bodes)
Actually, that should work if you followed the tutorial and started with the actual wallpaper 68px from the top. Because the first 68px are overlaid by the Kontakt controls. Make sure your txt is also correct:
Duccio
Nothing happens…….. I try all what was possible: insert a blank line in txt file, calculate the correct number 608-68 = 540 for set_ui_height_px……I try to recreate Resource folder ….. I have all picture correct in Resource/pictures folder……. my code is this:
in picture I have fondo.png and fondo.txt
but nothing happen!!!!
YummyBeats
(in reply to Duccio)
That’s weird, actually it should work. Did you make sure the folder structure is correct (Resources/pictures) and that the nki lies in the root folder?
Can you try to use one txt from another tutorial like from this advanced wallpaper tutorial
If this doesn’t work, I assume there is something wrong with the png file itself. Did you store it as png-24?
Next you can check if the png & the text file is stored correctly into the resources container (.nkr,.nkc) when creating it. With this you can also check that the txt file and the png are correct
Also try to save your nki then close Kontakt and reopen it again using your nki.
Lastly, if all doesn’t help, we really have to get “forensic”
Check all the files from the advanced wallpaper tutorial against your files & code and hopefully find any differences.
Frank de Leeuw
Thank you for that tutorial.
However, one thing has not worked out for me, and that is setting the space between the header and the actual image.
This is my script:
on init
    message ("")
   make_perfview
  set_ui_height_px(492)
end on
But the image is still stuck to the header and a bit of it is missing as a result, how can I fix that, please?
Thank you.
YummyBeats
(in reply to Frank de Leeuw)
Hey, you can’t set a spacer for the initial wallpaper. Also you have to add the 68px for the Kontakt head/controls to your initial wallpaper. Sorry in the text was misleading (forgot to add the 68px). So if you set your UI height to 492px your initial wallpaper must be 560px high. But leave a spacer of 68px in your image since the first 68px are always covert by Kontakt’s control panel. So in other words the initial wallpaper is placed at Top: -68px, Left: 0px
If you are using multiple bg wallpapers via labels you have to crop these 68px again from your other wallpaper images since labels are really placed at Top: 0px and Left: 0px. So this time your image size equals the set_ui_height size.
Note: the first 68 pixel of your initial wallpaper are always visible no matter what unless you remove the initial wallpaper completely.
[edit: the article has been edited to point this out more clearly]
Anonymous
thanks
CMM
There is a miswording in your first example “make_perfviev” instead of “make_perfview”.
Thanks for help!
YummyBeats
(in reply to CMM)
thx, fixed it!
Anonymous
thank’s man it was alot of help to me…